Latest

Phil Jones Headphone review

As far as the general content of this blog, this post is going to be a bit off topic.DSCF0846

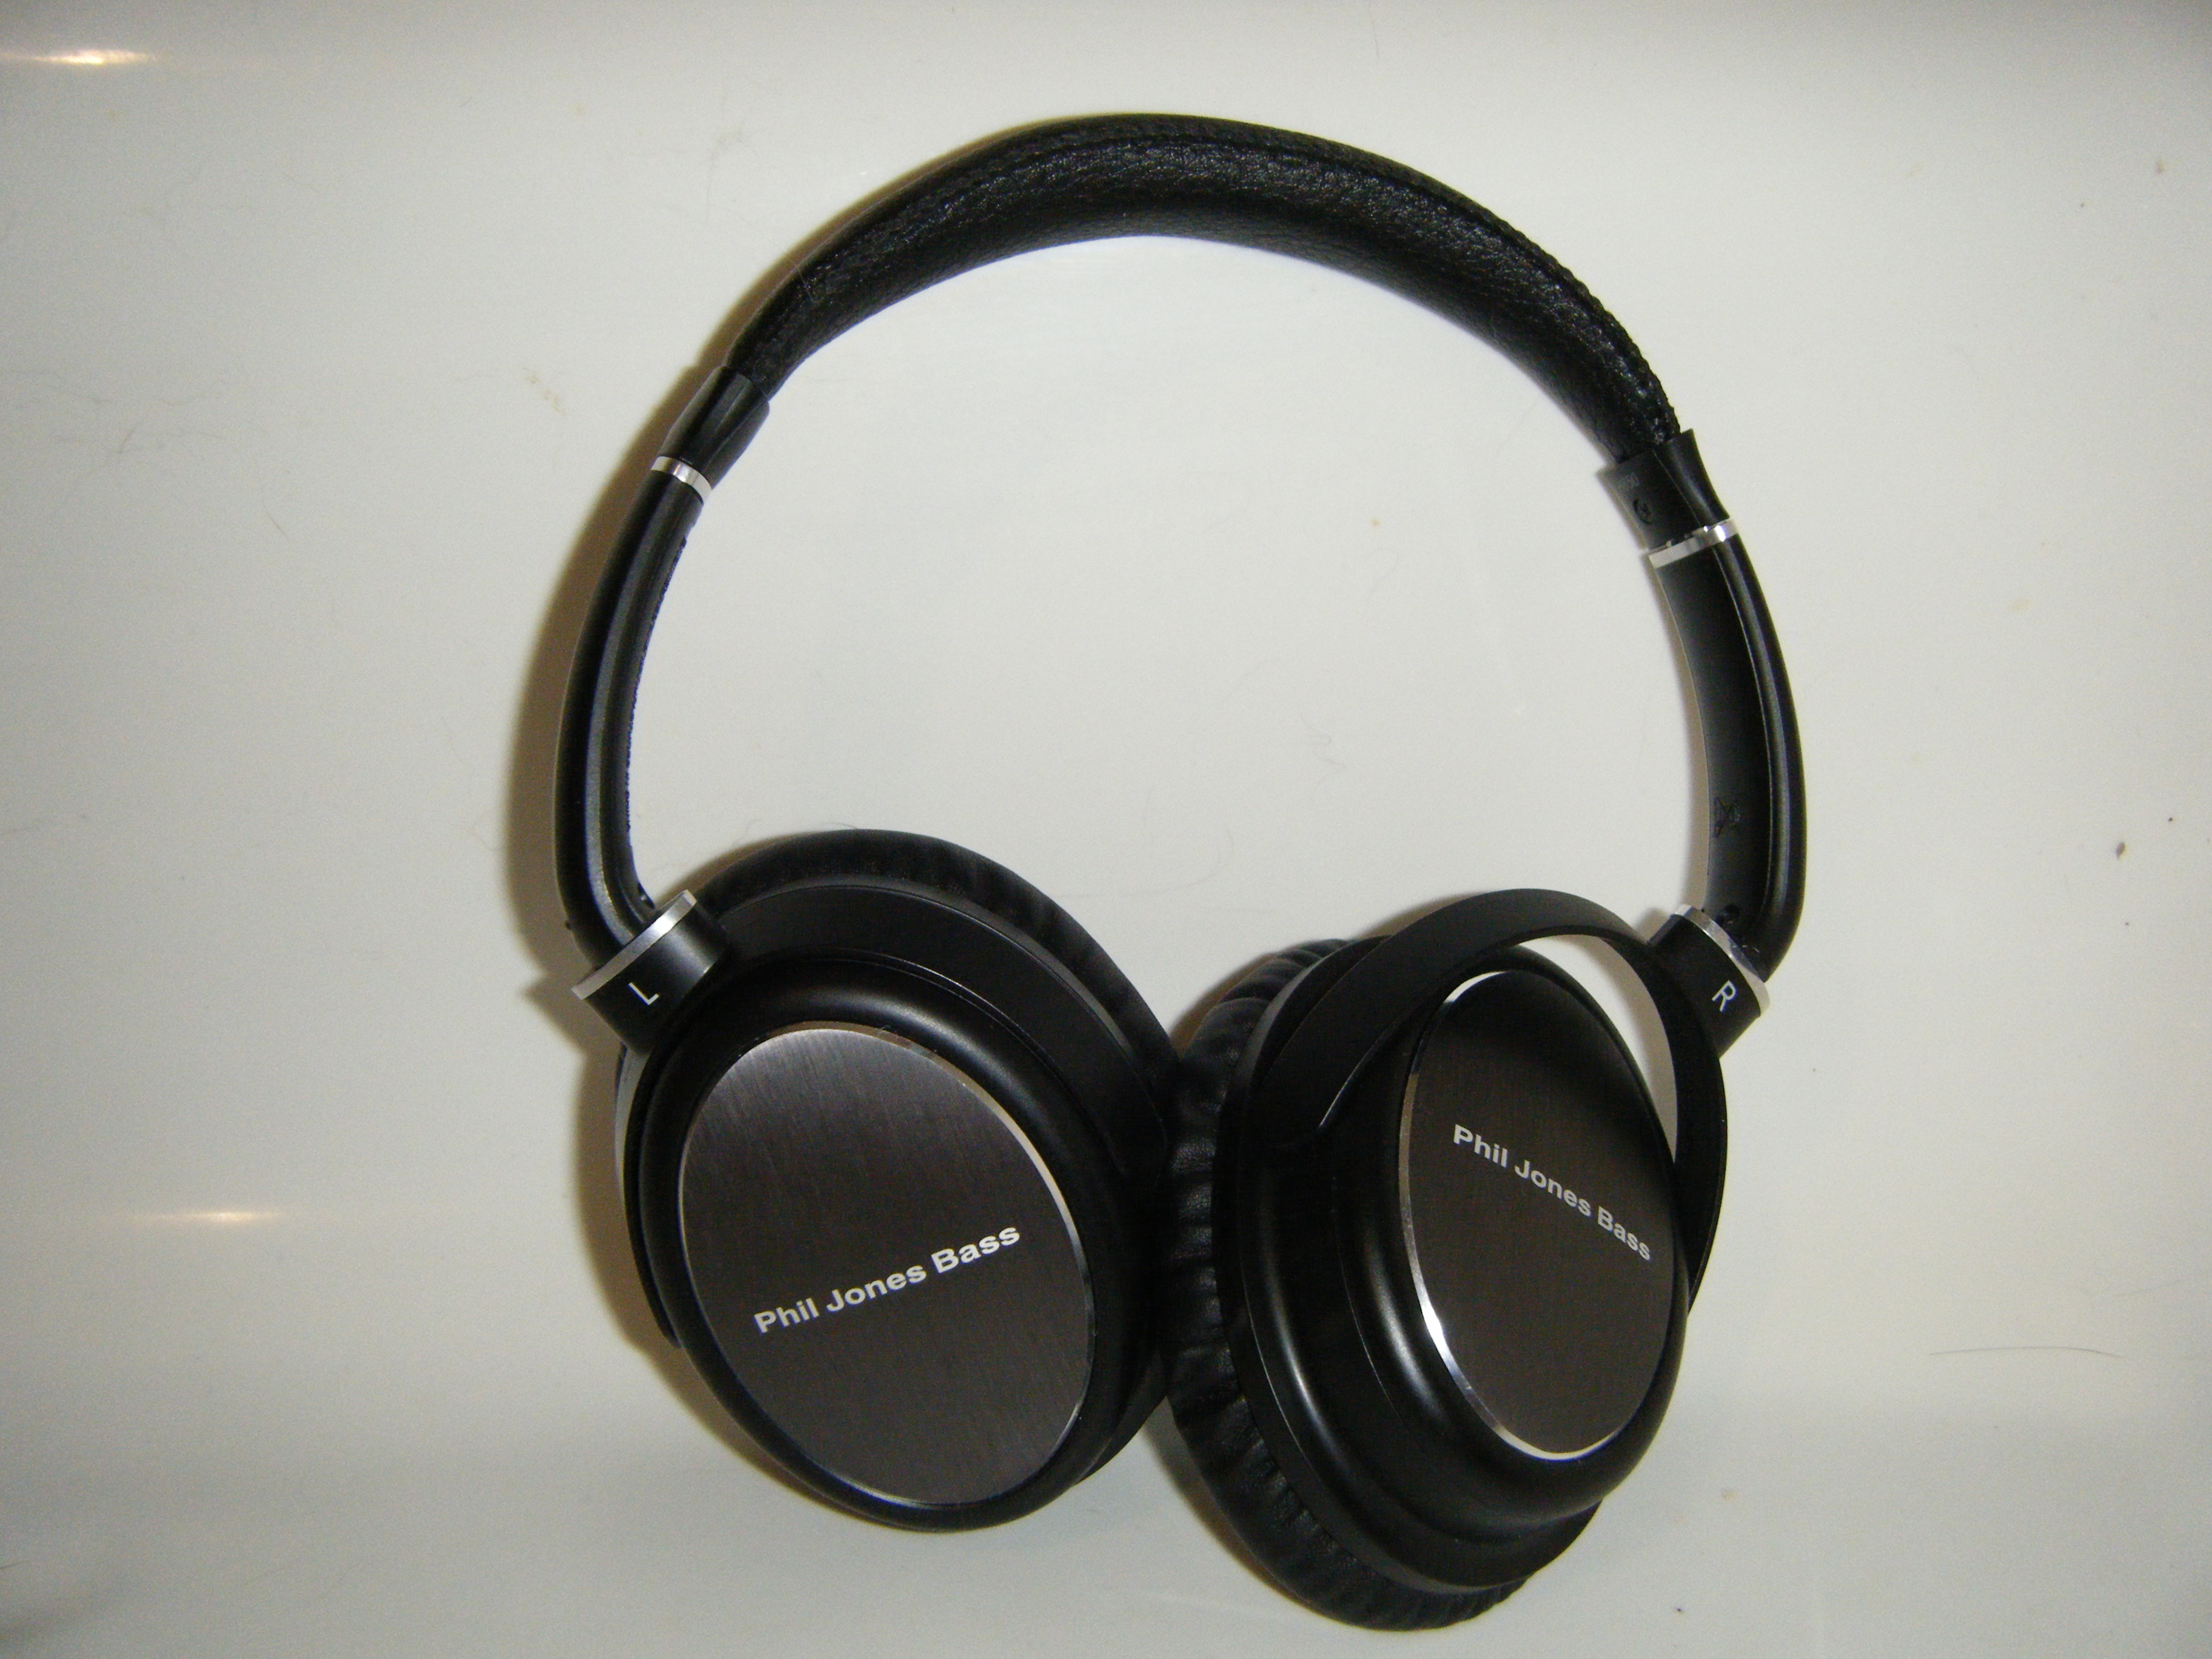
A few weeks ago Phil Jones posted a contest on his Facebook wall. ID all of the bass players in the photo, and the first one would win a pair of his headphones. I won. I have played bass guitar for many years, and even sold guitars and basses for a number of years. Through that job I have met a number of amp designers, and bass builders. As a rule they are very knowledgeable, and passionate about what they do. Phil Jones was no exception. I met him at McMurray Music when he brought in a couple of early models of his amps and cabinets to the store I worked at. They were and still are pretty unique to the world of bass amplification. The general rule is bigger is better. Mr Jones tends to go the other way, and build smaller. I’m with him there, and agree. Smaller speakers are faster and thus more responsive and accurate. Putting several together means you get more moving surface area, that responds more quickly, and moves more air than a traditional speaker cabinet design.

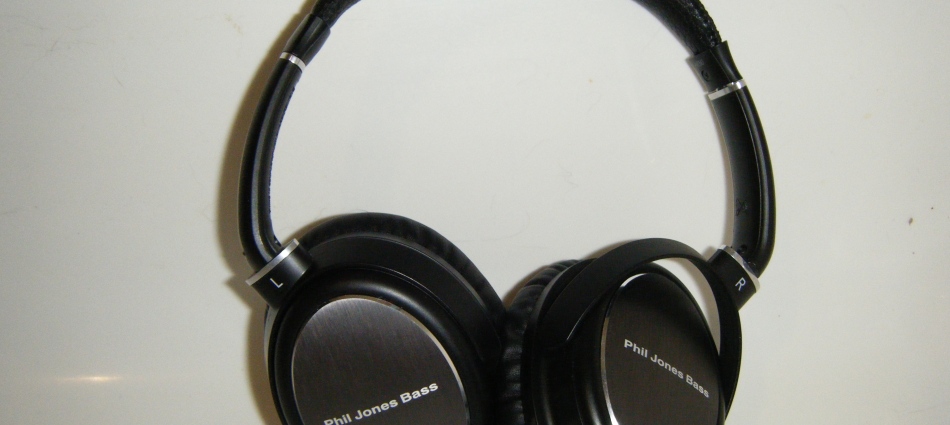
His headphones are designed to be more accurate compared to others, and they are also fairy reasonably priced. Phil Jones Bass is based in the St Louis area where I have lived for most of my life. This meant that the headphones arrived very quickly for me. They were mailed Monday and I picked them up from the Post Office Tuesday after work! They came in a box that was well packed and in good shape. Inside was the box for the headphones. It had nice looking, but simple artwork. The headphones were neatly packaged, and seemed like they were very secure, which is great for preventing damage in shipping. In the box you will find of course the headphones themselves, a 2 meter cord with 1/8″ plugs on both ends, and also a 1/4″ adapter.  To me, the removable cord is one of the smartest things ever.

Left side without removable cord

Left side without removable cord

No matter how good or bad the headphones I have ever used, the weak point was the cord. At some point the cord will break, and you have to go buy a new pair of headphones. Now, I can run to Radio Shack, Guitar Center or anyplace else that would sell a cord with 1/8″ stereo plugs on both ends. If I decided I wanted longer, I can get that too. One end of the cord that comes with them has a slightly different shape which allows it to lock into the headphones. You just push them into the hole, and give them a twist. Clever!

Left: Standard plug Right: Locking plug

Left: Standard plug
Right: Locking plug

DSCF0853

Ready to listen!


I don’t have a lot to compare them to unfortunately. My previous benchmark for headphones was the Sony MDR-7506. It has been several years since I have been able to use those for extended periods. (I was introduced to them when I worked at KRCU, the NPR affiliate at SEMO, where I attended college.) I really liked them, but I never had the need to purchase a pair of headphones like that. Aside from that, lately most of my headphone use has been in the form of ear buds, which are notorious for not having good sound. My current ear buds are JVC, and they beat out a pair of Skullcandy ear buds. I find ear buds to be somewhat uncomfortable, and after wearing them for a while they are actually irritating. I decided that in order to really review these I needed to put them to use in a variety of listening situations. The short answer is that they do sound really good. I haven’t found anything that they didn’t work well on. Pandora through my cell phone over Wi-Fi (Cell phone is an LG Google Nexus 5) as well as watching Netflix movies on my phone both sounded great. My iPod (generation 6 iPod Nano, with a pretty wide variety of music, and no problems. I even played a few computer games on my laptop using them, and was surprised to hear things that I never had before. When I was deciding between the ear buds, and also when I was putting these to the test I try to listen to things that will really test them. I generally want to hear as much of what is happening as possible.  I like to listen to Bjork for this. Her music generally has lots of little things going on that get lost when the low end is emphasized by cutting mid range frequencies as seems to be done on a lot of ear buds. The headphones seemed to respond evenly across the frequency range.

Next I plugged them into headphone out of my trusty bass practice amp. A late 80’s Peavey Microbass. I also plugged in my favorite (at the moment) bass. A Chandler Continuum. Think early 60’s Fender Jazz bass, but with a fretless ebony fingerboard.  This yielded the tone that I always expect out of this bass. It sounds like what it looks like. A Fender Jazz. That does mean that you get to hear the noise of a buzzing single coil pickup when you dial one of them down a bit. I also got to hear just how sloppy my bass playing has become with the minimal practice that I do lately. Still, the headphones present an accurate picture of what I am doing, good and bad. They left me wanting one thing though. I would love some sort of mixer to play both a CD or MP3 player and my bass through into the headphones. I’m sure that is out there somewhere, but it isn’t something I have. If I am not mistaken the Bass Buddy, would fill this need nicely.

I suppose the short answer to the question, is these headphones sound great.  They are comfortable, and sound great. They also include some pretty clever ideas. I would recommend them to bass players as well as anyone else looking for a good sounding pair of headphones. My understanding is that you can find them online for around $100. I’m not sure of the exact price, but they would certainly be worth it!

You can’t buy bacon like this!

My family generally is pretty supportive of me trying to do various things. Sometimes they might think I am a bit weird for actually doing them, but when they get exciting things to eat out of the deal they don’t complain too much. Last year I got a copy of Charcuterie by Michael Ruhlman, and I was inspired. I will admit that I love bacon. I have for a long time. I’m sure it isn’t the best thing I could eat, but I don’t eat tons of it.

Anyway, there are a couple of challenges to making bacon. The first is getting all of the required ingredients. Only two were particularly challenging. First you need to find “pink salt”. “Pink salt” is salt and sodium nitrite. It goes by a number of different names: Prague Powder #1, Instacure #1, DQ #1, etc.. This is an essential ingredient for curing any kind of meat. I was able to order mine online from The Sausage Maker. They have lots of interesting stuff for sale, and free shipping which is always nice!

Instacure #1

Instacure #1

The second ingredient that will be a little challenging to get is the pork belly itself. Grocery stores in my area don’t stock it, and most of them won’t even order it. I found one place that said they could get me belly from Berkshire pigs. (If that is actually true I will probably do that next time, but I will have to order it.) The place I got the belly from keeps it in stock all of the time. I ended up with 7 pounds. I know it sounds like a lot, but after curing and smoking you lose some. I’m not sure exactly how much though

DSCF0733

Pork belly!

. After reading through Charcuterie, I decided to go with the recipe that Michael Ruhlman posted on his blog. I would follow his instructions pretty closely. This is something that you really do want to get right, and he is far more of an authority than I am. The reason I say this is that you nitrites are something you don’t want to get too much of, and you really don’t want to skip. A big part of the flavor of bacon comes from the nitrites. But if you don’t have them, you can end up with botulism. Spores can end up in the meat from the garlic, and in the low temperature and low oxygen environment they can multiply. You don’t want that! I had more than 5 pounds of pork belly so I carefully followed the directions for adjusting the amount of everything in the cure. Instacure #1, kosher salt, brown sugar, dry thyme, black pepper, garlic and crushed bay leaves is what I had in the cure.

DSCF0735

Curing mixture

I then evenly rubbed the curing mixture over all surfaces of the pork belly. I realized pretty quickly that even though I had 2.5 gallon bags I was going to need to cut the belly in half in order to fit it in anything. Each half of the belly got rubbed and then put into a bag.

DSCF0736

Pork belly in the curing mixture

The bags got stuck in the fridge, and every day I flipped them over. I figured this would help ensure that all of the belly got cured. The mixture of salts and sugar draws water out of the meat through osmosis. Flipping the meat makes sure that the liquid covers the all of the meat pretty evenly.

Cured

Cured

Skin side, cured

Skin side, cured

Once the meat has cured, rinse the curing mixture off with cold water. Then, you can leave it for a couple of days or smoke it. If you don’t have a smoker you can also cook the meat in a 200 degree oven until the meat reaches 150F. Then cool it, and slice it.

I used my stovetop smoker, and some apple wood chips to smoke it. Some smokers have specific methods to use, so follow those. Your goal is to reach an internal temperature of 150F. I use my probe thermometer for this, because it gives me accurate results without having to open the smoker to check the temperature. I also set it to the temperature I want to reach.

Cured pork belly in the smoker

Cured pork belly in the smoker

Smoked!

Smoked!

Smoked!

Smoked!

Once the pork belly has cooled enough to handle, but while it is still pretty warm cut off the skin. This is a little tricky, but using a sharp knife you will be able to remove it. You can see the line between the skin and the fat. Cut in below that, and lift the skin up. Then use the knife to separate the skin from the fat.

Smoked! Skin side!

Smoked! Skin side!

Skin side, skin removed

Skin side, skin removed

Allow the bacon to cool fully. Then use a very sharp knife to slice the bacon.

BACON!!

BACON!!

I used my FoodSaver to package everything up. When I was checking my list, some of my friends and family got bacon for Christmas. At first they may have been a bit confused, since you can go to the store and buy it pretty easily. This is far tastier than any bacon I have ever gotten from the store!

Packed, and labeled!

Packed, and labeled!

It is still a bit strange to me that I made my own bacon, but I did, and it is delicious. It is well worth the time and energy to make your own bacon.

Bacon Tomato Jam!

This is the good stuff!

This is the good stuff!

Well, that’s it. I’ve gone nuts… Or have I? Actually, no. This is absolutely delicious. The best part is that it is really easy too! Maybe the best part is how good it tastes. This is a great way to add loads of flavor to roasted chicken, pork, turkey, fish, or use it as a spread on a sandwich. Hell, its good on a spoon! Sweet, smoky, tomato-y, and very flexible.

How do you make this wonderfulness?

Core and dice 1 pound of tomatoes

1/4 pound bacon, cooked crispy, and crumbled

1/2 onion

1/4 cup sugar

1 1/2 Tablespoon sherry vinegar (The recipe I had called for cider vinegar, but sherry is tastier!)

salt and pepper

1/2 Tablespoon dried thyme

Combine the tomatoes, sugar, onion, thyme and vinegar in a pot, and bring to a boil. Add the bacon, and reduce the heat to a simmer. Simmer uncovered for about an hour, stirring frequently. By this time a lot of the the liquid will be evaporated, and what you will have is a jammy consistency from the tomatoes and onions cooking down. Taste and season with salt and pepper. That was pretty easy!

With this combination of flavors you may have a hard time deciding where not to use it. Once you’ve made it, I’d be willing to bet that you’ll make it again!

Smoked Yellow Tomato Soup

Sometimes, inspiration strikes… from the most unlikely places. I needed to make soup, and I was wandering around the various parts of the kitchen looking for things to use. In dry storage I ran across some apple wood chips that we use to smoke things sometimes. Then in the cooler I saw a bunch of yellow tomatoes that we needed to use really soon. So, I started thinking, “What if I smoked the tomatoes?”

When I started making this soup that was really all I had for an idea. I had no idea how long it would take to get a decent smoke flavor into the tomatoes, and no idea how I was going to season it once I was ready to put the whole thing together. It all worked out quite nicely, through a series of accidents, and correcting them!

Step one, deal with the tomatoes. There are a couple of things that you will have to do with this, but none of them are particularly difficult. First, quarter the tomatoes, and cut out the little place where the stem attached. Then squeeze the quarters to get rid of the seeds. All of the flesh parts of the tomatoes are going to get smoked. I seasoned them with salt and pepper and a little olive oil. Get your smoker set up. At work I use a deep hotel pan to hold the soaked wood chips and a perforated hotel pan to hold the smokee. Then I just cover the whole thing with foil. Simple, and having an exhaust fan keeps it from getting smoky inside! I have a stovetop smoker I use frequently at home, and it works well.  I think I had the tomatoes on for 15 to 20 minutes. Then, I just tasted a piece of a tomato to see if I had enough of a smoke flavor. I didn’t want it to be super strong, but I wanted to be able to taste it. Once I had it where I wanted it I pureed it in a food processor, and left it to cool. (This doesn’t make a lot of puree, but you’ll be adding more liquid to get it to a soup consistency, so don’t worry. I nearly doubled what I had to start with,)

Next I roughly chopped some onion and tossed it with a little salt, pepper, cumin, corriander, and oregano, and a couple of cloves of garlic and olive oil. This all got roasted under the salamander (broiler) until lightly browned, and tender. Then I pureed it, and let it cool over night.

When I was ready to start the soup I started adding the onion mixture to the tomatoes, and added some lemon juice to brighten it up, and water to get the consistency I was looking for. I added more than I thought I wanted. Oops! So, to balance out the lemon juice I added a little bit of honey. Now, it was too sweet. Salt helped bring things together a bit better, but although it tasted good, it was kind of one dimensional. I started looking for things that would help accent the smoke flavor, and balance out the sweetness a bit more. With the cumin, corriander and oregano I realized that I could go with sort of a Southwestern thing, and grabbed the container of ground ancho chili powder, and the black pepper. Ancho is not hot, but has a nice earthy flavor. Turns out the ancho was EXACTLY what was needed in the soup! I had no idea how much I needed so I added a little and tasted, and added more, until I liked it. This soup was all about tasting. There was no recipe, and no plan. Just a bunch of tasting spoons, a container of soup, and me, playing!IMG_20130717_142551

Sometimes, this is the most fun kind of cooking. Start with something simple, and see what you can do with it. In this case, a very tasty cold soup!

I will often garnish soups, just because it is nice for presentation and if you can make something that goes nicely flavor-wise that is always a good thing. In this case I made a little bit of pico de gallo.

With the hot weather we have been having lately a nice cold soup is a great lunch, or part of your lunch.

Anyway, my point here is we should give ourselves time to really play with our food. We need to eat, but it doesn’t have to be boring, and it should really taste good and be fun to get it on the table! Right?

Pear, chevre, and arugula pizza

Pizza is one of those foods I have always loved.  For me, that generally means tomato sauce, cheese, and crust (gluten-free of course.), and sometimes I will add some sausage. I know it isn’t all that exciting, but sometimes it really is good.

I decided to do something a little more interesting, and lighter since it is now pretty hot here. No sauce of any kind, and just sliced pear,  chevre, and a little bit of parmesan. Then about a minute before it comes out of the oven I tossed a handful of arugula on it! Thinking about it, a nice gorgonzola could also work very well in a pizza like this.

I’ve been on a bit of a quest for pizza crust. So far, the winner in terms of taste, texture, and relative ease of making it happen is from Emeril Lagasse. I know, weird, right? Apparently, he has daughters who have some gluten issues. He came up with this pizza crust for their gluten-free cookbook, and it is great! It makes enough crust for four pizzas for two people. You can pop the leftover par-baked  crusts in the freezer, and pull them out for a quick dinner. Just top them and bake.

Pear, chevre, and arugula pizza!

Pear, chevre, and arugula pizza!

Obviously, if you have a pizza crust that works well for you, go ahead and use it. Amy was a bit skeptical of this at first, but it is a fantastic flavor combo! It is always fun to try things that may not immediately spring to mind when you have a dish as iconic as pizza.

Tea smoked chicken salad with ginger lime vinaigrette!

Life is funny sometimes. My cousin got married Friday evening, and we all had a great time. My sister is getting married next month. Today was SUPPOSED to be her bridal shower. We wanted to have food, but keep it kind of light, and chicken salad was the idea. Except that my sister doesn’t really eat mayo, so I decided that I would come up with something that would keep her happy too. As you might imagine, I have lots of cookbooks, and although I may not have made anything out of all of them I have read through them, and sort of picked out anything that might come in handy for later. In this case I went to my copy of Heart of the Artichoke for this recipe. I decided to adapt it slightly for my needs. I made everything for the party before I knew it was going to be snowed out!

This is exactly the weather you expect in spring, right?

This is exactly the weather you expect in spring, right?

I had made tea smoked chicken before, but this turned out far better. It also took longer, but I think the results justify the extra time. The nice thing about this particular smoking method is that it was a little less intense. The chicken was pre-cooked and so all I needed to do was give it enough time in the smoke to give it flavor, rather than trying to cook it through. The first step will give you a very tasty broth which you could certainly eat if you wanted. I just don’t have space for that at the moment, but I did taste it, and it was very nice.

6 chicken legs quarters, salted and peppered (I broke them down into thighs and legs just to make them a little easier to deal with)

water to cover

1″ piece of ginger peeled and chopped roughly

2 cloves of garlic chopped

4 green onions, sliced into 1″ pieces

3 star anise

Season the chicken and allow it to sit  in the fridge for a couple of hours. Place in a large pot and add the water and all of the other ingredients. Bring up to a boil and then turn down to a simmer. Simmer for about 30 minutes, and then remove the chicken legs from the water. Allow the broth to simmer for another 30 minutes and adjust the seasoning. (If you want to keep it. I didn’t.)

On to the smoking! Here is where you want to make sure you have good ventilation! You can use the method I used in my previous post, or if you have a stove top smoker you can use that. I have a Cameron’s stove top smoker, and it works very well. It also uses less of the wood chips or tea in this case.

Cooked chicken legs

1/2 cup tea leaves (Yes, you can use Lipton)

1/2 cup brown sugar

1/2 cup raw white rice

1 teaspoon fennel seeds

1 tablespoon black peppercorns

1 teaspoon whole cloves

2 – 3 star anise crushed

Preheat the oven to 400F. Combine everything but the chicken legs in a bowl, and line a skillet with foil, and add the tea mixture to the bottom if the skillet. Then place a rack on top, and place the chicken on it. Place the lid on the skillet, and turn the heat on high. When you start to hear the sugar crackling and smell the smoke, give it two minutes, and then turn off the burner and place the whole thing in the oven for 10 minutes. Don’t take off the lid to check, or you will lose all of the smoke.

If you’re using a stove top smoker, follow the  manufacturer’s directions for how much wood chips (tea) to use. You can still use the time above.

Tea smoked chicken

Tea smoked chicken

Once the chicken was smoked I pulled the meat off the bones, and roughly chopped it into bite sized pieces.

Next I made the ginger lime vinaigrette.

Vinaigrette dressing are very simple to make, and add lots of flavor to a salad. In this case it complimented the chicken very nicely! You can use a whisk to make this dressing, but I almost always use my food processor. It chops up the shallots and ginger for me, and makes quick work of emulsifying the dressing. Mine is a small one, and for doing recipes like this it works perfectly.

1 shallot finely diced

1 garlic clove minced

2 teaspoons finely diced or grated ginger

(I just dropped all three in the food processor, and let it do what it does!)

1 Tablespoon rice vinegar

salt and pepper to taste

1 Tablespoon Dijon mustard (Pardon me, would you have any Grey Poupon?)

1/4 cup neutral oil, canola, grape seed

1 Tablespoon toasted sesame oil

juice of 1/2 lime

I also added about 1 Tablespoon of honey just to balance out the flavors a bit.

If you’re doing this with a whisk, add the shallots, garlic, and ginger to the bowl, and add the lime juice, vinegar, honey, and mustard, and whisk to combine. Slowly whisk in the oils, until combined. If you have a food processor you can use the same order. It will just go a bit more quickly.

Ginger Lime Vinaigrette

Ginger Lime Vinaigrette

To serve your salads, mix a little of the dressing with the chicken, and then place a handful of spring greens on a plate (I drizzled a bit of the dressing on the greens as well.) Place the chicken on top of the greens, and add some sliced cucumber, and finely sliced scallions! Enjoy! It was a nice lunch with my family even if the shower was canceled!

Enjoy the delicious salad!

Enjoy the delicious salad!

_

Is your pet food gluten-free?

Marishi

Marishi

Lots of people have pets.  We have a couple of cats, and they are pretty typical for cats. Cute, crazy, and like to sleep when you let them. They also like to eat, and that is where things get tricky. You see, pet foods often contain fillers. Cats in the wild would eat meat, and that is the bulk of it. Dogs eat a more varied diet, but primarily a meat based diet.

What is in your pet’s food? Let’s face it, your pets need to eat. You probably also don’t want to have your pets eating people food. You also don’t want to cook them special food most of the time. On the other hand, you don’t want to be glutened from your pets food. Go look at the package for your pet’s food. What did you find? Wheat? Barley? Oats? Surprised? I was too. Why do your pets need these? I doubt that they do. Of course grains are cheaper than actual meat and meat products. The cheaper the food the more likely it seems that you will have gluten in your pet food. Obviously, when you have a person with Celiac in your home you want to eliminate as much as possible the sources of gluten that they are exposed to.

This is not just an issue in dry food. Wet food also contains gluten.

The other day we were picking up some more food for our cats, and we found some that actually didn’t seem to contain any gluten. It wasn’t even that much more expensive for a similar amount of food as we normally bought. They also had some canned food, and it was actually marked as being gluten-free and grain free. We generally only feed our cats canned food as a treat.

We picked up a bag of the dry food. Right now we are feeding them a mixture of their old food with the new stuff to transition them to the new food. Some of the dry food formulas do contain oats, but the one we got only had rice.

As it turns out, they really do seem to like this new food quite a bit. When we gave them a can of the new wet food, it looked like food. It even smelled less like cat food than most of the canned cat food I have seen. I won’t say it smelled good, but they seemed to like it!

I guess really this post is just something for you to think about, and be aware of. You can’t control what your cats do, and they are going to go where you may not want them. This is just one more little thing that can help you feel better. Obviously, you still need to maintain normal hygiene standards, but it gives you one less thing to worry about. That is never a bad thing.

Chicken Cacciatore!

Chicken cacciatore is one of those dishes I always heard of, but strangely, never had as a kid. I couldn’t tell you why that is, but it certainly is worth taking the time to make. It is such a simple dish, and in many ways, reminds me of the poulet basquaies I made ages ago. I like these kinds of rustic dishes, they are generally pretty easy, and have loads of flavor. Simple ingredients that don’t get screwed up by trying to make them into something they aren’t.

What you need:

chicken, whole, cut up, or breasts if you prefer.

olive oil

10 – 12 crimini mushrooms sliced thin

garlic, minced how much do you like?

1 onion sliced thinly

1 bell pepper sliced thinly (about the same size as the onion)

1 can diced tomatoes

white wine

salt and pepper

herbes de provence

That is really it. You could add pancetta, red pepper flakes, bay leaves, fresh basil, you know,  that kind of thing.

I decided serve it on top of some gluten-free  noodles, and I picked up a box of Schar tagliatelle.

This is pretty straightforward stuff. Season the chicken with salt, and pepper. Heat the oil in a skillet, and sear the chicken. When it releases from the pan, flip it over, and sear it on the other side. The second side won’t take as long as the first. Remove the chicken and set it on a plate for the time being.DSCF0560

DSCF0561
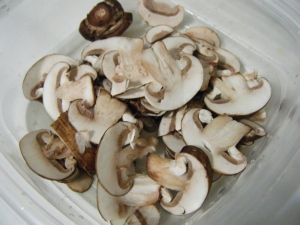
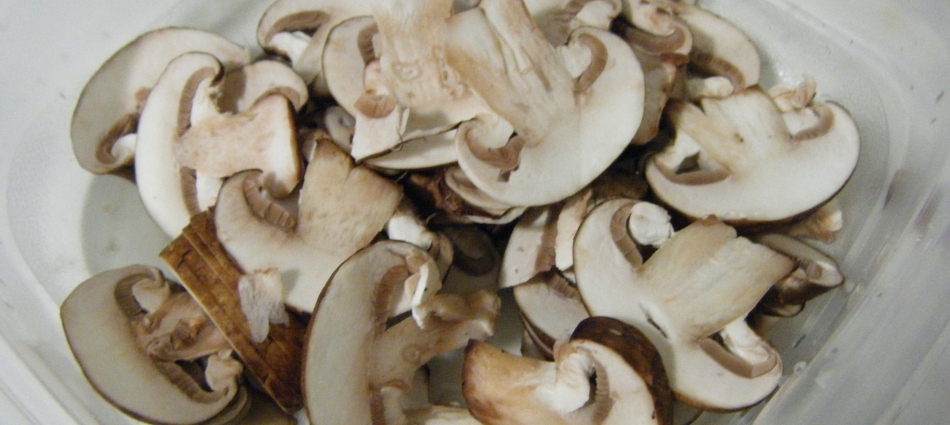
There should be some oil left in the pan. Throw in the mushrooms add a little salt, and saute them until they are tender.DSCF0564 
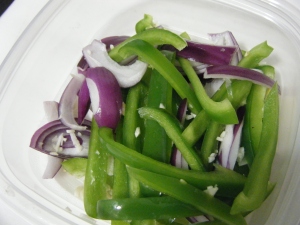
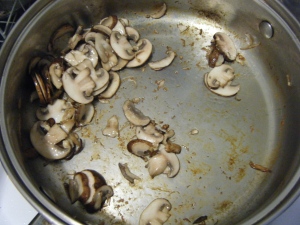
Then add the bell pepper, onion and garlic. Again, add a touch of salt, and saute until it is tender.  DSCF0565
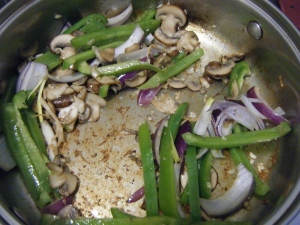
Add some wine, and bring it to a boil.  Scrape the brown bits up. I can’t really tell you how much, I wanted enough of the liquid to get some with the noodles. DSCF0566
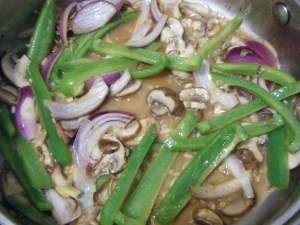
Next add the can of tomatoes and stir them in and bring the whole thing up to a boil. Add the black pepper and herbes de provence.  See how much liquid you have, if it looks like enough that you can get the chicken down in it part way.  Put the chicken in with whatever liquid is on the plate, put the lid on the skillet, and turn it down to a simmer.

While the chicken is simmering get the water boiling for your pasta. Cook the pasta according to the directions on the box. Keep in mind that the chicken will be fine if it is done a little before the pasta. The pasta on the other hand will turn into a gummy mess while the chicken finishes cooking.

Put some noodles on the plate, and top it with the chicken, and then veggies, and sauce. Bon appetit!    DSCF0567

Asian BBQ chicken

Sometimes I pick up gluten-free sauces on a whim. A while back a local grocery store had a bunch of San-J stuff on sale, and I picked up at least one of anything that sounded interesting! A couple of them were pretty easy. A couple I was less sure what to do with. Strangely, the BBQ sauce was one I was less sure what to do with.  I figured it out though! It turned out great!

I decided to make us kind of an Asian BBQ chicken bowl, maybe something along the lines of a San Sai teriyaki bowl, except with some stir fried veggies too.  As part of going for that kind of dish I also decided I would cut the chicken breasts in half so I would have thinner pieces that would cook more quickly. (This also has the nice benefit of making portion sizes a bit more in line with what we should be eating rather than what we CAN eat.)

I thought about marinating the chicken like I did with the sweet and sour chicken, but in this case I decided to just go with a little salt and pepper.

I decided that I would throw the chicken in the grill pan since it works quite nicely when I don’t feel like dragging out the grill and lighting it and waiting. I can just toss it in the oven for a while and get it nice and hot.

I liked the way the veggies came out in the sweet and sour chicken I made earlier, and decided I would do them that way. They also end up reheating better. (They don’t turn into mush.) We also had some jasmine rice, so I thought that would go nicely in our bowls too.DSCF0487

Cut up whatever veggies you want to stir-fry. I always do the vegetables first. I used an onion, a red bell pepper, and a couple of carrots.  I just cut them up into similar sized pieces. This keeps them cooking at about the same rate.

Then I cut the chicken breasts in half so that they would be thin. This would make them cook faster.DSCF0488

Since I had my grill pan in the oven preheating at 350F for about 30 minutes it was nice and hot when I was ready to go.

Start the rice first since it takes the longest to cook! You could use white or brown. If you do make brown rice just remember it takes a little longer to cook.

Next I got the grill pan out of the oven, and set it on a burner. Place the chicken in the pan at 45 degree angle to the direction of the grill. I find that it can be helpful to use a little cooking spray on the food in cases like this. Using tongs gently life a corner of the first piece. If it comes up easily turn it 90 degrees. If it doesn’t, just leave it there a little longer. After you’ve given it a turn, let the chicken sit there for a couple of minutes. This will give you nice grill marks.DSCF0489 Then flip it over, and do pretty much the same thing. Once I had both sides marked I drizzled on a little of the sauce and smeared it around, flipped it over, and put sauce on that side, and then popped the whole thing in the oven.DSCF0493

I had my veggies cut up already so I got a skillet nice and hot with a little bit of oil, and added the veggies to it. I sauted that for a couple of minutes until the carrots got a little tender. The chicken was done. I sliced the chicken into thin pieces across the grain of the breast, and on a bias. This will give you the most tender piece of meat. How tender it is is really your perception of how long the muscle fibers are when you are chewing them. The longer the fibers the more you have to chew them.

DSCF0495

This was very tasty, and very easy to do. Also, this was a pretty quick dinner. Next time, I am going to tweak the sauce a bit by adding some Sriracha to it, and might add a little bit more of it.

Roast pork tenderloin with apple and pistachio stuffing

I had been thinking about this for a while, when I was talking to my mom about what she wanted to do for Christmas Eve dinner. She mentioned that she wanted to cook a pork loin and stuff it with something. My idea was to use some apples and pistachios to stuff a pork loin. Amy doesn’t eat pork(except bacon), so I was thinking I would stuff a turkey breast tenderloin instead, but then this opportunity presented itself!

This was a chance for me to do a few things that I don’t get to do very often. While I understand and know HOW to make an “S” cut in something to make a round food into a flat sheet, I had never done it. I had also never made stuffing like this. I made some cornbread stuffing at Thanksgiving, so I had a general idea of how it would work. I was pretty much going to wing it! The final thing that I had never done, but more or less understood was how to tie a roast!

Equipment you’re going to need:

Sharp knife, boning, non-flexible slicer or utility

Cutting board

Butcher’s twine

Some kind of roaster or sheet tray

An accurate thermometer

I figured the first thing I would do is make my stuffing.

1/2 loaf Scharr baguette cubed (I didn’t end up using all of this, but I was winging it, so just used what I needed.)

1 Jazz apple diced

1/2 cup pistachios after being shelled. Crushed

salt and pepper

6 fresh sage leaves fine chiffonade

1 Tablespoon approximately fresh rosemary chopped

chicken broth

1 pork tenderloin

Follow the directions of the Scharr bread. Or use whatever you have handy. This would be a good place to use up leftover gluten-free bread. I didn’t have any, so I did what I had to. Allow it to cool, and then cut it into small cubes. Combine all of the other dry ingredients of the stuffing, pour in a little bit of the chicken broth at a time to get all of the bread moist. It doesn’t need to be soaking wet.

The stuffing I had left!

The stuffing I had left!

Next we need to make an “S” cut in the pork. Using a knife you’re comfortable with, slice about 1/3 of the way from the top almost all of the way through. Then turn it around and cut the lower part the same way. This will give you a flat-ish sheet to stuff, and roll up.

Spread the stuffing on the pork loin. You’ll want to leave a little space at the edge so that you can roll it. Then to keep everything in place you’re going to need to tie it with the butcher’s twine. There are a number of ways this can be done. The easiest is to cut several lengths of string that you can slide under every couple of inches and tie securely. The best knot for this is a fisherman’s knot, (That is what we always called it, but a butcher might call it something else) which is a basic overhand knot with an extra tuck through the open loop . The other way is a little trickier, and involves making loops and tightening them up and making another loop, and only actually making knots at the end. Which is what I did. IMG_20121224_133347.747The one in the foreground is stuffed, and the one in the background is not. I cut it wrong, and tied it back up so that it would cook more evenly!
Season the outside with salt and pepper and roast it at 350 degrees until your thermometer reads 150F if you want medium and 160 if you want it well. Remove it from the oven and allow it to rest for about 10 more minutes. During that time the temperature will continue to rise. Also, the juices in the meat will redistribute during this time. Just let it sit covered with a piece of foil.

This turned out to be pretty tasty, and we all enjoyed it. I even stuffed a chicken breast for Amy with the same stuff. (She didn’t care for it, but she doesn’t really like stuffing, and doesn’t think fruit and meats go together, so…) All told, it was a very nice evening with my family, and that is never a bad thing.